Links on this page go to Amazon. As an Amazon Associate, techinterview.org may earn from qualifying purchases. Prices change often, so we show price ranges only; check the product page for today’s price.
Echo is what makes a candidate sound far away on a compressed call: your voice bounces off bare walls, reaches the mic a few milliseconds late, and the codec smears the two together. Treatment fixes that by absorbing reflections close to you, not by soundproofing the room. The spec that matters is thickness: a porous absorber needs roughly 2 inches to work across the speech band, and thin decorative tiles mostly absorb hiss.
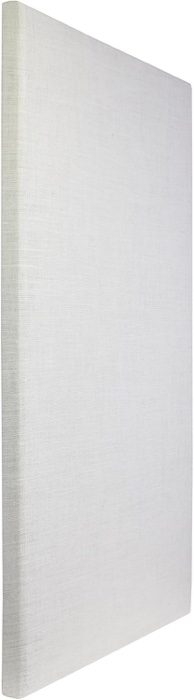
ATS Acoustics Sound Absorbing Acoustic Panel 24" x 48" x 2" Beveled Edge (Ivory)
For engineers who want one or two panels that measure like real treatment and look like office decor.
Why we picked it. ATS publishes lab numbers, which most Amazon panel brands do not: absorption coefficients of 0.67 at 250 Hz and above 1.0 from 500 Hz to 4 kHz, the range speech occupies, on a 2 inch Rockwool AFB core in a wood frame with a full wood back. Gearspace users describe the panels as well made, cost effective and easy to hang with the included clips, screws and anchors. One panel behind your head and one on the side wall covers what a call mic picks up. The burlap wrap reads as a fabric wall panel on camera rather than a studio wedge. Sold and shipped by ATS Acoustics.
Flaws but not dealbreakers. ATS lists an average of 12 lb per 24 by 48 panel, and forum owners call it difficult to hang alone; the wall needs anchors rather than adhesive, which renters may not like. Some owners noted a mineral wool smell out of the box that faded. The standard burlap version is not fire rated; ATS sells a fire rated Sona fabric version as a separate listing.
| size | 24 x 48 x 2 in, beveled edge |
|---|---|
| core | Rockwool AFB mineral wool, solid wood frame, full wood back |
| fabric | 100% jute burlap, ivory |
| absorption | NRC 1.0; 0.12 at 125 Hz, 0.67 at 250, 1.17 at 500, 1.12 at 1k, 1.08 at 2k, 1.08 at 4k (ATS data) |
| weight | about 12 lb per ATS; Amazon lists 8.3 lb |
| in_the_box | one panel, aluminum clips, screws, anchors, mounting template |
See on Amazon →availability and price range checked September 2026
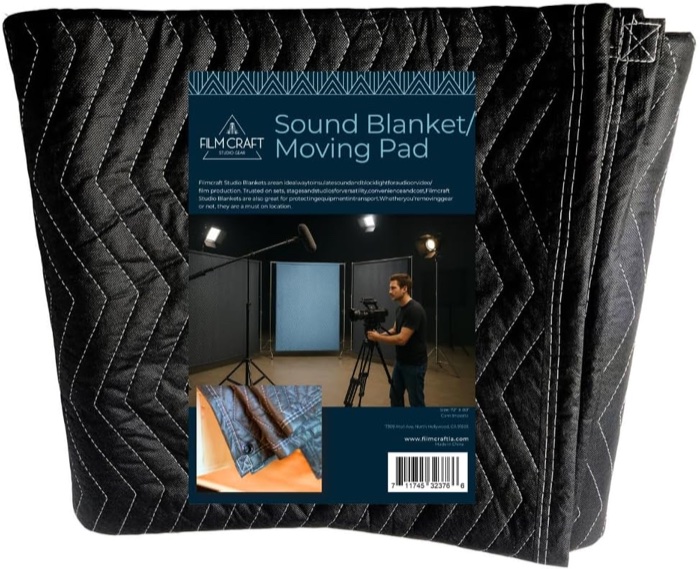
Filmcraft Sound Dampening Blanket with Grommets, 72" x 80" (Single Blanket)
For anyone who needs the wall behind them dead by tonight and can hang a blanket.
Why we picked it. Sound On Sound's answer to whether you need a reflection filter is that hanging a duvet or similar behind the performer makes a massive difference, and a heavy quilted blanket is the cheapest way to do that on a wall. This is a 72 by 80 inch quilted polyester blanket with a 65 lb per dozen fill weight, denser than a standard moving pad, with grommets on all four sides so it hangs from hooks or a curtain rod without tools. Filmcraft says to hang it 2 inches off the wall for an air gap. It covers 40 square feet, more than a pack of foam tiles.
Flaws but not dealbreakers. It looks like a moving blanket, so keep it out of frame or behind your chair, and like every soft absorber this thin it does nothing for low frequencies. Blanket makers point out that moving pads are not tested for absorption, and Filmcraft publishes no NRC. Six pounds hanging from grommets needs real hooks or a rod, not tape.
| size | 72 x 80 in, about 40 sq ft |
|---|---|
| weight | 6 lb; 65 lb per dozen fill weight |
| material | quilted polyester shell and fill |
| hanging | reinforced grommets on all four sides |
| in_the_box | one blanket, no hooks |
See on Amazon →availability and price range checked September 2026
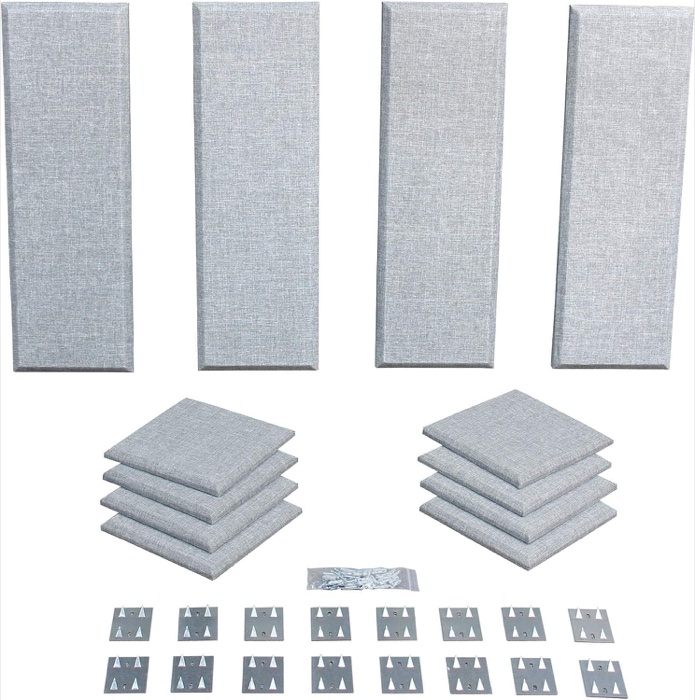
Primacoustic London 8 Room Kit (Grey)
For people on calls all day who want a whole small room treated with tested panels and hardware.
Why we picked it. The London 8 is a room kit rather than a pile of tiles: four 12 by 36 inch Control Columns at 1.5 inches thick and eight 12 by 12 inch Scatter Blocks at 1 inch, all high density glass wool wrapped in acoustically transparent fabric, plus impalers, anchors and screws. Primacoustic rates it for rooms up to 100 square feet, the spare bedroom most engineers interview from, and lays out a live end, dead end placement that puts the columns behind and beside you where reflections reach the mic. The panels are Class A fire rated and third party tested at Riverbank. Amazon buyers rate it 4.7 stars.
Flaws but not dealbreakers. It costs about as much as a good USB mic and webcam together, well above this guide's usual ceiling, and fabric studio panels are unmistakable on camera. The 1 and 1.5 inch thicknesses are thinner than the ATS panel, so absorption rolls off sooner below 500 Hz. Mounting means a dozen holes in drywall, which renters should plan for.
| contents | 4 Control Columns 12 x 36 x 1.5 in; 8 Scatter Blocks 12 x 12 x 1 in |
|---|---|
| core | high density glass wool, resin hardened edges, polyester fabric |
| room_size | up to 100 sq ft (9 m2) |
| hardware | 16 Surface Impalers, drywall anchors, screws |
| fire_rating | Class A, Riverbank tested |
| colors | Grey; also Black, Beige, Paintable white |
See on Amazon →availability and price range checked September 2026
How to choose
Look for thickness and a published absorption table. Acoustic consultants put the floor for voice at about 40 to 50 mm; a 2 inch mineral wool or fiberglass panel absorbs close to fully from 500 Hz up, which is where speech lives, while 0.4 inch polyester tiles and 1 inch foam mainly catch frequencies above 2 kHz and leave the boxy midrange alone. Ignore NRC claims that come with no frequency data, and ignore the word soundproof: absorbers do nothing to stop traffic or a roommate through the wall. The common mistake is spreading thin tiles across every wall for looks. Put a small amount of thick material where reflections actually reach the mic, the wall behind your head and the side wall nearest you, and treat the surface behind you before anything else.
Reviewers at Sound On Sound say the single most important area to treat is directly behind and to the sides of the speaker, so hang the first panel or blanket on the wall behind your head at camera height, then add one on the side wall nearest your mouth. Moving the mic closer to you cuts room sound more than any panel, and mute when you are not talking.
Also considered
- Auralex Acoustics Studiofoam Wedgies 2" x 12" x 12", 24-Panels, Charcoal Real 2 inch foam with a manufacturer NRC of 0.75 and a UL 94 HF-1 flammability rating, but a wall of charcoal wedges behind you reads as a streaming setup, and foam needs spray adhesive that takes paint with it.
- BUBOS 6-Pack Wood Grain Acoustic Panels, 23.6" x 23.6" Looks the best of the bunch and ships from Amazon, but at 0.35 inches of polyester it only catches high frequency reflections, which is why the listing itself limits its claim to mid to high frequency flutter echo.
- sE Electronics RF-X Reflexion Filter (Black) Sound On Sound says shields like this help but cannot turn a bad room into a good one, and a half moon of foam around a mic inside the frame looks odd on an interview call; treat the wall first.
Useful next steps: